Handrail replacment
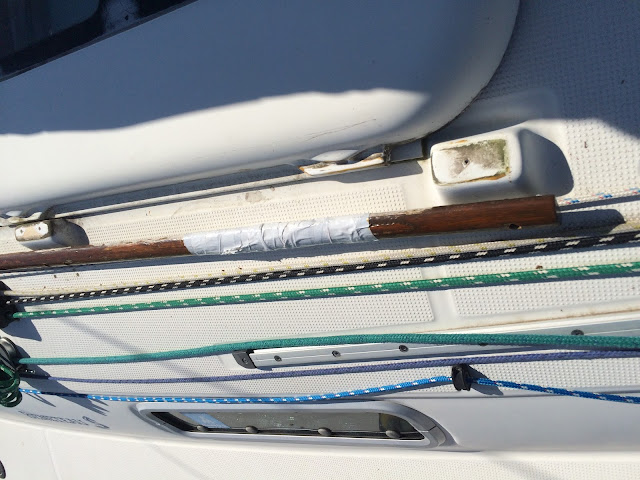
After 15 years of hard use, the starboard cabintop handrail on BlueJ began to crack. Partially because the wood was not properly treated on the bottom, and partially because of crew constantly clambering over the cabin-top to the new windward side. I tried to glue and screw it back together, but in the end it failed again. So I taped it as a stop-gap, and started to look at a new solution.
One big issue I have with the construction on the First 260 is the manner in which the rails are attached. Not bolted but screwed into place with 4 SS screws, they could be pulled off under load. I HATE structural screws on sailboats. Happily, as far as I can tell these are the only screws used in the construction of the 260. They just happen to be in an unsafe place. In addition, because of the screws, removing the rails requires pulling off teak caps covering the screws, not an easy job and it damages the rails. It is the reason that a large abandoned mud dauber (a type of non-biting wasp) nest existed under my sliding top. I was unable to get to it without breaking off the caps and removing the rails, so it stayed there for years. Finally it goes!
Along with the nest, the rails had collected 15 years of dirt and dust that could not be cleaned without removing the sliding companionway top. 30 minutes of cleaning and it looked pretty much like new.
I went through some deliberation on what to replace the rails with. Due to their rather simple shape, it seemed I could have them custom-made locally rather easily. I could also think about using a synthetic material like Plasteak as well. The company that makes Plasteak will create new rails for you using your old one as a pattern. You just send it to them cut in half. But I've seen how much flex Plasteak has over long spans, in particular when hot. The decision was made easy when I found the rails on the Beneteau USA Spare Parts web site, and noted the price. That is a very good deal for two large pieces of custom cut teak witha 15% discount for ordering on-line yet to be taken!
As the new rails are Beneteau wood parts, they are made in Beneteau's custom wood mill in France. This is where EVERY wood piece that makes its way onto a Beneteau or Jeanneau is created. Beneteau USA places an order with the mother company and the parts show up in the weekly air container. Except for these parts, which took over 3 months to show. I assume they were part of some pre-determined manufacturing schedule. As you can see in the parts diagram, every wood part for the deck is available.
The rails come without holes for the screws, which need to be counter-sunk for the screwheads and wooden caps. The best way to make sure the holes are in the right place is to use the old part as a template, lining up one end and carefully drilling through the existing small screwhole and into the new part. You can then drill the counter-sink with a 3/8 inch drill bit taped a mark to limit the depth of the drilling. You do NOT want to make this too deep! Mounting them is then very straightforward.
The finished rails look super and should be good for a very long time if properly maintained.
For North Americans, Beneteau USA spare parts is on-line HERE.


Comments
Post a Comment